
A deep cleaning checklist is a room-by-room task list that targets the grime, grease and dust that regular weekly cleaning never reaches. The fastest way to start: pick three tasks and do them today.
Start now (pick your time block):
- 2 hours: Degrease kitchen cabinets and benchtops, scrub the toilet and basin, vacuum all high-dust areas (ceiling fans, vents, skirting boards)
- 4 hours: Add oven interior, bathroom grout and shower screen descaling, one bedroom including mattress vacuum
- Full day: Complete kitchen, two bathrooms, living areas and one bedroom to professional standard
Angi recommends deep cleaning two to three times a year for most homes, targeting built-up areas like baseboards, ceiling fans and grout that routine cleaning skips. Care scheduling a full deep clean at least once every six months, adjusting for pets, kids or heavy household traffic. If the job feels bigger than a weekend, Shinewisecleaning offers police-checked professional teams across Canberra ACT and Perth WA who work from a landlord-aligned checklist.
Key takeaways
A room-by-room deep cleaning checklist, worked top-to-bottom with the right supplies gathered first, is the most reliable way to reset a home and keep it clean between professional services.
| Point | Details |
|---|---|
| Start with supplies and declutter | Gather all products and clear surfaces before touching a single room. |
| Work top-to-bottom, room by room | Finish one room completely before moving to the next; never clean floors before high surfaces. |
| Deep clean frequency | Most homes need a full deep clean two to three times a year; pets and kids push that to three or four. |
| Hire a pro for the hard tasks | Move-out cleans, post-renovation, heavy mould and steam cleaning are worth outsourcing. |
| Shinewisecleaning | Police-checked teams in Canberra and Perth handle bond cleans, steam cleaning and one-off deep cleans. |
Table of Contents
- What do you need before starting a deep cleaning checklist?
- Room-by-room deep cleaning checklist
- How to deep clean appliances and tricky surfaces
- Fast deep-clean options: 2-hour, 4-hour and one-day plans
- How often should you deep clean, and how long does it take?
- When should you hire a professional cleaner?
- A cleaner's perspective: the one rule that changes everything
- Shinewisecleaning handles the tasks that take the most time
- Sources
What do you need before starting a deep cleaning checklist?
Gathering everything before you start is the single biggest time-saver. A mid-clean trip to the supermarket for a missing product breaks momentum and adds 30 minutes to any job.
Supplies checklist:
- All-purpose cleaner and a dedicated degreaser (two separate products)
- Disinfectant spray or concentrate
- Microfibre cloths (at least six, colour-coded by room)
- Scrub brushes: one stiff-bristle for grout, one softer for surfaces
- Vacuum cleaner with crevice, upholstery and brush attachments
- Flat mop and bucket, plus a separate scrubbing mop for tiles
- Step stool or small ladder for high surfaces
- Rubber gloves (heavy-duty, not the thin disposable kind)
- Baking soda, white vinegar and dish soap for DIY solutions
- Bin bags and a recycling bag for decluttering as you go
Safety notes worth reading before you open a single bottle:
Never mix bleach with ammonia-based cleaners or with vinegar. The reaction produces chloramine gas, which causes respiratory irritation even in a ventilated room. Open windows before using any spray-on oven cleaner or heavy degreaser. If you find mould covering more than roughly a 30 cm × 30 cm patch, that is a job for a professional with appropriate PPE, not a DIY scrub.
Workflow rules that actually matter:
Work top-to-bottom in every room without exception. Dust from ceiling fans and shelves falls onto surfaces below, so cleaning floors first guarantees you clean them twice. Start at the farthest corner from the door and work toward the exit, so you never walk back across a freshly mopped floor. Finish one room completely before moving to the next. Jumping between rooms feels productive but produces a half-clean house.
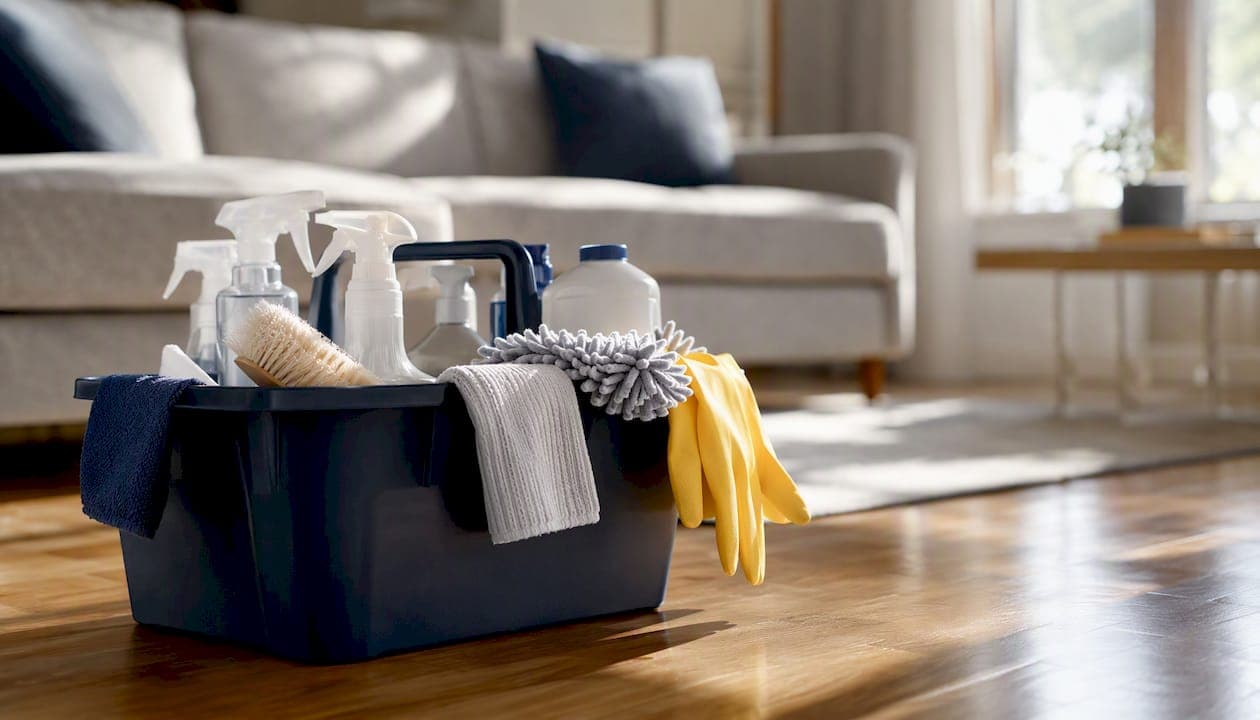
Pro Tip: Assemble a portable cleaning caddy before you start and label two separate cloths: one marked "kitchen" and one marked "bathroom." Cross-contamination between these two rooms is the most common hygiene mistake in DIY deep cleans, and labelled cloths cost nothing to fix it. The caddy itself means every product travels with you, cutting the time you spend walking back to the laundry cupboard by a surprising amount.
Martha Stewart's deep-clean guide and professional workflow resources both recommend assembling supplies and decluttering each room before touching a single surface. Decluttering first is not optional: cleaning around clutter means you clean less of the actual surface.
Room-by-room deep cleaning checklist
Work through each room in the order below. The sequence moves from highest-grime to lowest, which means the hardest work is done while your energy is highest. 101planners offers a free customisable printable version if you want to generate a checklist filtered by your specific number of bedrooms, bathrooms and extras like a garage or pets.
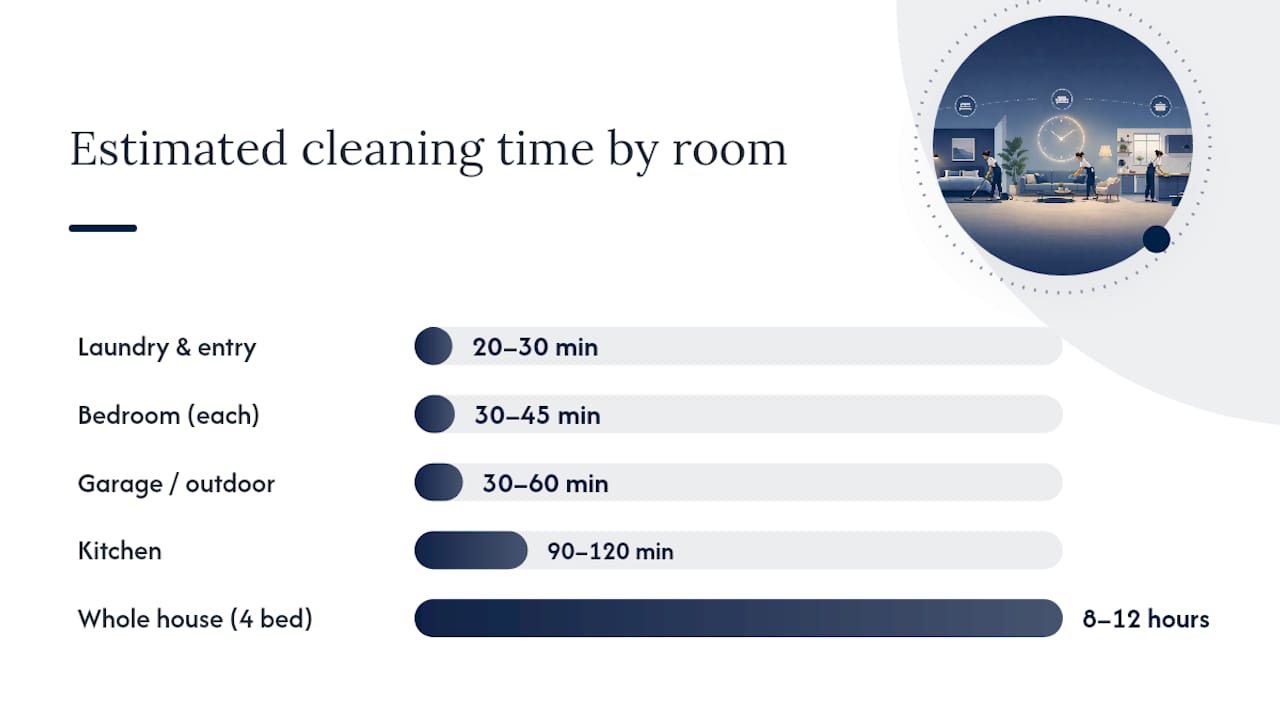
Kitchen (allow 90–120 minutes)
- Empty and wipe all benchtops; move appliances and clean underneath
- Degrease cabinet fronts, handles and the range hood filter (soak filter in hot degreaser water)
- Clean inside the oven (see appliances section for method)
- Empty, wipe and sanitise the fridge interior; vacuum coils at the back
- Pull the fridge away from the wall and mop underneath
- Descale and sanitise the sink, taps and drain
- Wipe backsplash tiles and grout lines
- Clean microwave inside and out
- Mop floor last, working from the back corner toward the door
Bathrooms (allow 45–60 minutes each)
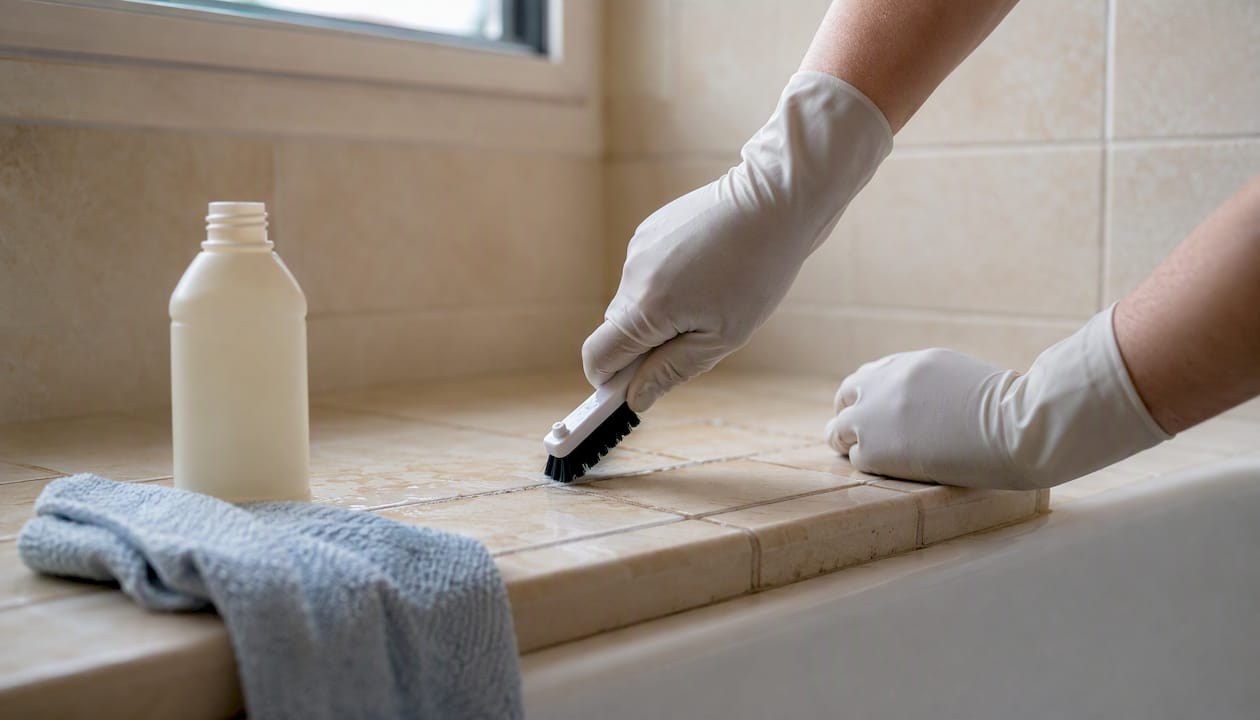
- Scrub grout lines with a stiff brush and a grout cleaner or baking-soda paste
- Descale the showerhead by soaking in white vinegar for 30 minutes
- Deep clean the shower screen with a descaler or a paste of baking soda and dish soap
- Scrub tiles from top to bottom
- Clean behind and around the base of the toilet, not just the bowl
- Wash or launder the bath mat and shower curtain
- Wipe vanity, taps, mirror and any shelving
- Mop floor last
Bedrooms (allow 30–45 minutes each)
- Strip and launder all bedding including duvet covers, pillowcases and mattress protector
- Vacuum the mattress using the upholstery attachment; sprinkle baking soda, leave 15 minutes, vacuum again
- Flip or rotate the mattress if the manufacturer allows it
- Dust the tops of wardrobes and wipe closet shelves
- Clean window tracks and wipe sills
- Dust blinds or wash curtains
- Vacuum under the bed and behind furniture
- Wipe skirting boards and door frames
Living and dining areas (allow 45–60 minutes)
- Dust ceiling fan blades and light fittings
- Vacuum upholstery including under and behind cushions
- Spot-clean fabric with an appropriate upholstery cleaner; wipe leather with a damp cloth and conditioner
- Wash curtains or wipe down blinds slat by slat
- Clean the TV screen with a dry microfibre cloth (no spray directly on the screen)
- Wipe skirting boards, door frames and light switches
- Vacuum and mop floors, moving furniture where possible
Laundry and entry (allow 20–30 minutes)
- Run a cleaning cycle on the washing machine (hot water, one cup of white vinegar or a machine-cleaning tablet)
- Wipe the drum seal and detergent drawer
- Clean the dryer lint trap and check the external vent for blockage
- Sweep and mop utility floors
- Wipe storage shelves and laundry sink
- Entry: sweep, mop, wipe down the front door and door frame, clean the doormat
Garage and outdoor areas (allow 30–60 minutes)
- Sweep the garage floor and remove any oil or grease spots with a degreaser
- Wipe storage shelving and reorganise as you go
- Sweep outdoor paths and patios
- Pressure-clean concrete where staining or mould is visible (or book pressure cleaning for heavy buildup)
- Wipe down outdoor furniture
Room-by-room time and task summary:
| Room | Estimated time | Key task groupings |
|---|---|---|
| Kitchen | 90–120 min | Appliances, cabinets, sink, floor |
| Bathroom (each) | 45–60 min | Grout, descaling, toilet, floor |
| Bedroom (each) | 30–45 min | Bedding, mattress, wardrobe, floor |
| Living/dining | 45–60 min | Upholstery, fans, blinds, floor |
| Laundry and entry | 20–30 min | Machines, shelves, floor |
| Garage/outdoor | 30–60 min | Sweep, degrease, pressure-clean |
| Whole house (2 bed) | 5–7 hours | All of the above |
| Whole house (4 bed) | 8–12 hours | All of the above |
How to deep clean appliances and tricky surfaces
These are the tasks most people skip, then regret. Each one has a right method and a wrong one.
Oven
- Remove the racks and soak them in hot water with dish soap in the laundry tub for at least one hour.
- Choose your method: a commercial oven cleaner (faster, stronger fumes, requires gloves and ventilation) or a baking-soda paste (mix baking soda with a small amount of water to a thick paste, coat all interior surfaces, leave overnight, then wipe clean with a damp cloth and a splash of white vinegar to neutralise).
- Never use oven cleaner on the heating element or the fan in a fan-forced oven.
- Wipe the door glass with the same paste; a razor blade held flat removes baked-on residue without scratching.
- Dry the racks fully before replacing them.
Fridge and freezer
- Empty the fridge completely and transfer perishables to a cooler with ice.
- Remove all shelves and drawers; wash them in warm soapy water in the sink.
- Wipe the interior walls with a solution of one tablespoon of baking soda per litre of warm water. This deodorises without leaving a chemical taste.
- Clean the door gasket (the rubber seal) with a damp cloth; mould in the gasket folds is common and responds to a diluted white vinegar wipe.
- Pull the fridge away from the wall and vacuum the condenser coils at the back or underneath. Dusty coils make the fridge work harder and shorten its life.
- Defrost the freezer if ice has built up more than about 5 mm.
Dishwasher
- Remove and rinse the filter (usually a twist-out cylinder at the base of the interior).
- Wipe the door seal and the spray arms.
- Run an empty hot cycle with a cup of white vinegar on the top rack, then a second cycle with half a cup of baking soda sprinkled on the floor of the machine.
- For a persistent smell, check the drain hose for kinks or blockage.
Grout and tiles
Mechanical scrubbing with a stiff brush and an alkaline grout cleaner removes surface staining. For heavy discolouration, a paste of baking soda and hydrogen peroxide left for 10 minutes before scrubbing works well on white grout. Chemical descalers handle mineral deposits on tiles in hard-water areas. Re-caulk any cracked or blackened silicone around the bath or shower base rather than scrubbing it: mould inside silicone cannot be removed, only replaced. If mould has penetrated behind tiles or into the wall substrate, that is a professional remediation job.
Upholstery and mattresses
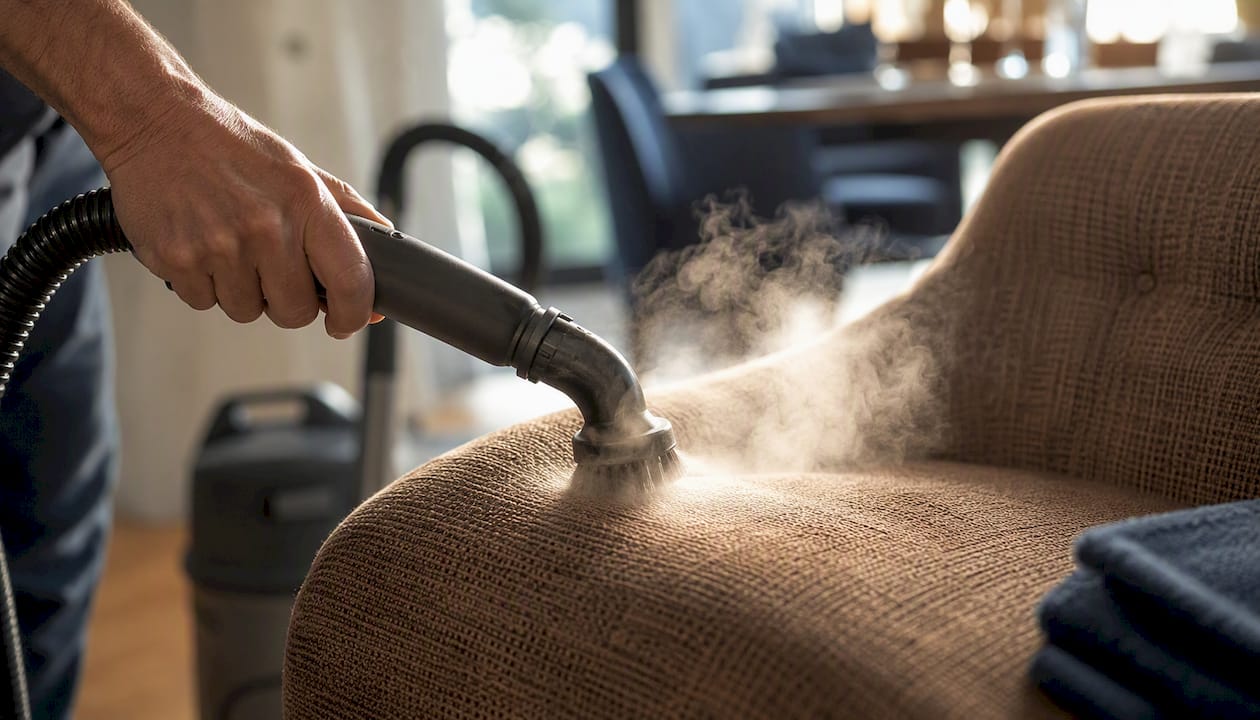
Steam cleaning is the most thorough method for fabric upholstery and kills dust mites without chemicals. Before using any product, spot-test on a hidden area and check the fabric care label: a "W" code means water-based cleaners are safe; "S" means solvent only; "X" means vacuum only. For mattresses, the baking-soda deodorise-and-vacuum method handles odour and surface dust well. For stains, a cold-water blot with a small amount of dish soap is the starting point. Professional carpet steam cleaning is worth booking when upholstery or carpets have pet odour, heavy soiling or have not been professionally cleaned in over two years.
Fast deep-clean options: 2-hour, 4-hour and one-day plans
Not every deep clean needs a full day. Here is how to prioritise when time is short.
2-hour emergency plan (guests arriving, quick reset)
Focus entirely on what visitors see and smell. Wipe kitchen benchtops and the stovetop surface, clean the toilet bowl and basin, sweep and mop visible floors, do a fast dust of the living area and declutter any surfaces. That covers the highest-impact, highest-visibility areas in the house. Skip anything behind closed doors.
4-hour plan (a solid Saturday morning)
Add the oven exterior and fridge exterior wipe-down, a full bathroom scrub including the shower screen, and one bedroom deep clean including a mattress vacuum. By the four-hour mark you have a genuinely clean kitchen, one clean bathroom and one bedroom. The 101planners checklist tool lets you generate a prioritised list for exactly this kind of partial clean.
One-day plan (the real reset)
Allocate the morning to the kitchen and bathrooms, which are the most time-intensive rooms. Take a 20-minute break after each major room. Spend the afternoon on the living areas and bedrooms. Finish with floors across the whole house. Build in two short breaks and one longer one at midday. Trying to push through without breaks produces sloppy work in the final two hours.
Prioritisation rule: always choose high-impact, high-visibility tasks first. If you run out of time, the inside of the oven matters less than a clean bathroom and a fresh-smelling living room. For the tasks that genuinely eat time, like carpet steam cleaning, oven interiors or heavy grout scrubbing, booking a pro for those specific add-ons while you handle the rest is a practical split. Pre-sale deep cleaning guidance follows the same prioritisation logic for rooms that matter most to buyers and guests.
How often should you deep clean, and how long does it take?
Angi's guidance puts the baseline at two to three times a year for most homes. Care.com recommends at least once every six months, with frequency increasing for households with pets, young children, allergy sufferers or anyone who works from home and generates more daily mess. If you are starting a recurring cleaning service, a full deep clean first is the sensible baseline: it resets the home to a standard that regular maintenance can actually maintain.
Scheduling triggers beyond the calendar:
- Moving into or out of a rental property
- Post-renovation or builders clean (plaster dust and construction debris require a different approach to standard cleaning)
- Before or after hosting a large gathering
- Seasonal change (spring and autumn are the traditional windows, and they align well with airing out the home)
- After illness in the household
| Household type | Recommended frequency |
|---|---|
| Single person, no pets | Once every 6 months |
| Couple, no pets | Once every 4–6 months |
| Family with children | 2–3 times per year |
| Household with pets | 3–4 times per year |
| Allergy sufferers | Every 3 months or more |
| Post-renovation | Immediately after works complete |
Pro Tip: Instead of scheduling two or three whole-house deep cleans per year, stagger the work: assign one or two rooms per month to a deeper-than-usual clean. By the end of six months, every room has been done without any single weekend feeling like a full-day ordeal. This approach also means you never face a house that has been neglected for six months all at once.
When should you hire a professional cleaner?
Some situations genuinely call for a professional, and recognising them early saves both time and money.
Hire a pro when:
- You are moving out of a rental and need a bond-ready clean that meets landlord and agent standards
- The property has just had construction or renovation work (post-construction cleaning involves plaster dust, silicone residue and debris that standard household products handle poorly)
- Mould covers a large area or has penetrated grout, silicone or walls
- Heavy grease buildup in the kitchen has gone beyond what a domestic degreaser can shift
- Physical limitations or time constraints make a full deep clean genuinely impractical
What a professional deep clean typically covers:
A professional scope goes beyond what most people manage in a DIY session. Expect inside-appliance work (oven, fridge, microwave), full bathroom descaling and grout scrubbing, high-dusting of ceiling fans and vents, skirting board and door frame detail, and window tracks. Upholstery steam cleaning and carpet steam cleaning are usually optional add-ons quoted separately.
How to prepare before the cleaners arrive:
- Declutter all surfaces so cleaners can access them without moving your belongings
- Secure or put away valuables and any fragile items
- Note specific problem areas in writing (heavy oven grease, mould in the shower, stained grout) and share the list with the team
- Confirm the full scope in writing before the appointment, including any add-ons
- Check whether the company uses surface-safe chemicals for stone benchtops or timber floors if you have them
Questions worth asking any professional cleaner:
- What is included in the standard scope, and what costs extra?
- Are the cleaning products safe for my specific surfaces (stone, timber, stainless steel)?
- Is the team police-checked?
- What is the estimated time on-site?
- What is the cancellation and re-clean policy if something is missed?
For a detailed local prep guide, how to prepare for a professional house clean covers the specifics for Perth properties, and the same principles apply anywhere.
Thumbtack's breakdown of what professionals include versus standard cleaning is a useful reference for setting expectations before you book.
A cleaner's perspective: the one rule that changes everything
The top-to-bottom, farthest-corner-to-exit rule sounds obvious until you watch someone ignore it and clean the same floor twice. Professional cleaners follow it without thinking because the alternative is visible: you dust a shelf, the debris falls onto the floor you just mopped, and you mop again. That is not a minor inefficiency. In a four-bedroom house, re-cleaning floors because you worked in the wrong order adds 30–40 minutes to the job.
The farthest-corner rule matters for a different reason. When you start at the door and work inward, you inevitably step back over surfaces you have already cleaned. Starting at the back of the room and moving toward the exit means your last step is out the door, and nothing you cleaned gets touched again.
The practical implementation is simple: before you enter any room, stand at the door and identify the farthest corner. That is where you start. Work in a U-shape or a Z-pattern toward the exit, finishing with the floor. One room, done properly, before the next one begins. The result is not just a cleaner house. It is a house that stays cleaner longer, because nothing was re-soiled during the process.
Shinewisecleaning handles the tasks that take the most time
The tasks that eat the most time on any deep cleaning checklist are the ones most people put off: oven interiors, carpet and upholstery steam cleaning, heavy grout scrubbing and bond-ready end-of-lease cleans. Shinewisecleaning covers all of them across Canberra ACT and Perth WA, with police-checked teams working from checklists built to meet landlord and agent standards.
With over 500 completed jobs, flexible scheduling and eco-friendly product options, Shinewisecleaning is a practical option whether you need a one-off spring clean, a bond clean in Canberra or a bond clean in Perth. For carpets and upholstery, carpet steam cleaning is available as a standalone booking or as an add-on to a full deep clean. Check availability and get a quote at Shinewisecleaning.
Sources
- Use our deep cleaning checklist for every room in your home
- What is a deep house cleaning (and do you need one)?
- Deep cleaning vs regular cleaning
- Deep cleaning vs. regular cleaning
- Deep cleaning checklist — free customizable tool + printable PDF